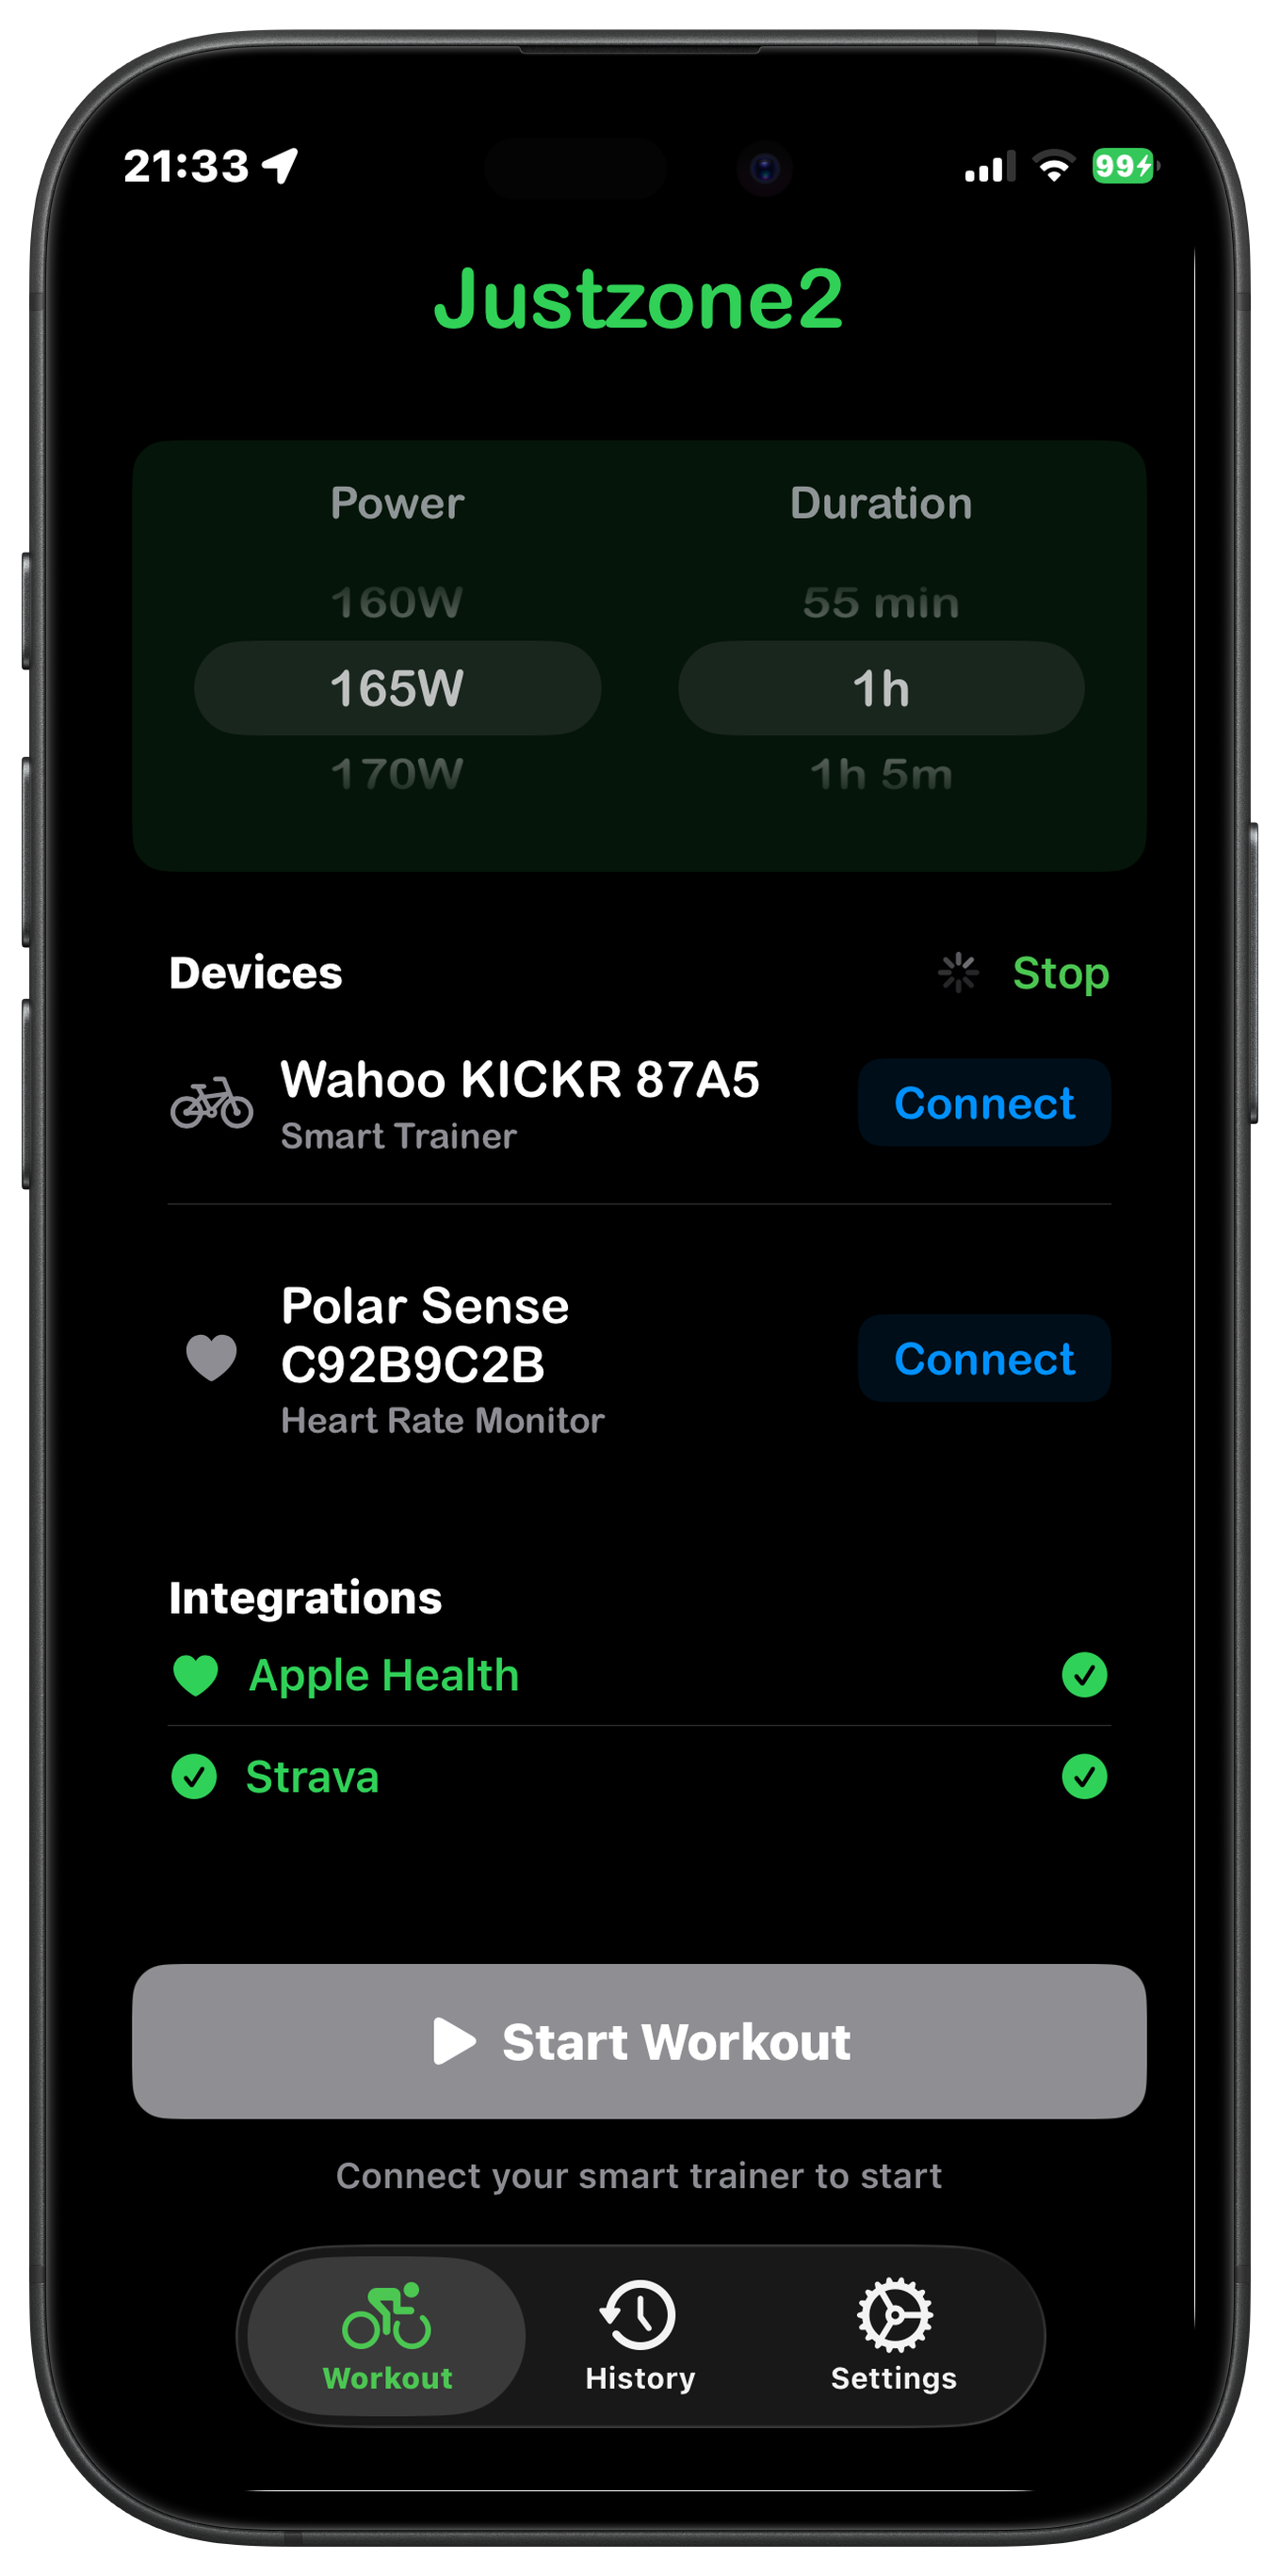
Justzone2 is built to get out of your way. There's one setup screen, one big green button, and a controller that does the thinking once you're rolling. But a first ride always goes smoother when you know what to expect — so here's the whole thing, start to finish.
You'll need an iPhone, a smart trainer that speaks FTMS (a Wahoo KICKR is the classic, but most modern trainers work), and a heart-rate source. That last part matters more than you'd think, so let's start there.
Step 1 — Set your Zone 2 range
Open the Settings tab first. At the top you'll find two wheels, Min HR and Max HR — the Zone 2 band the whole app aims for. It's worth getting these roughly right before your first ride.
If you don't know your numbers yet, a decent starting estimate is 60–70% of your maximum heart rate. A common rough max is 220 minus your age — so for a 40-year-old, that's about 108–126 bpm. It doesn't need to be perfect today; you can refine it once you've felt a few rides. The honest test of Zone 2 is simple: you can hold a conversation in full sentences. If you're gasping, your range is set too high.
While you're in Settings, this is also where you'll Connect to Strava (optional, but it's how your rides upload automatically) and find the Diagnostics Log if you ever need to troubleshoot.
Step 2 — Pick your effort
Head to the Workout tab. Up top are two dials:
- Power — your target in watts. This is the effort the trainer will hold you at. If you're new, start conservative; you can nudge it live mid-ride.
- Duration — how long you want to ride. The session auto-completes when you reach it, so you can genuinely set it and forget it.
Step 3 — Pair your gear
In the Devices section, tap Connect next to your trainer when it appears (give the pedals a turn to wake it up — the app scans automatically).
Then choose your HR Source. Justzone2 supports three:
| Source | Best for |
|---|---|
| HR Strap | The gold standard — a chest strap is the most accurate and responsive. Connects straight to your iPhone over Bluetooth. |
| Apple Watch | No strap needed. Your iPhone wakes the Watch, which streams heart rate back during the ride. |
| AirPods Pro | AirPods Pro 3 can read heart rate from your ear — handy if they're already in for the podcast. |
Accurate, responsive heart rate is what makes zone targeting feel smooth, so a chest strap is the recommendation if you have one. Whatever you pick, you'll see live bpm appear once it's connected.
Step 4 — Choose your assists
Two optional switches shape how the ride runs:
- Zone Targeting — the headline feature. When on, the app automatically trims the trainer's power to hold your heart rate at the midpoint of your Zone 2 band. Leave it on.
- Warm Up — starts you at half your target power for the first 60 seconds before settling into the full target, so your heart rate isn't shocked from cold.
Step 5 — Hit Start, then relax
Tap the green Start Workout button and you're riding. The workout screen shows everything at a glance: current heart rate, current power (with your target underneath), the session timer, and a live chart of HR and power against your Zone 2 band.
Here's the important bit — once you start, you mostly stop touching the phone. If Zone Targeting is on, the controller is already at work: it nudges the power up a little when your heart rate sits low in the band, and eases it back when you drift high. It does this about once a second, gently, for the whole ride. (Curious how? We took it apart in the espresso post.)
You can still take over any time with the + / − power buttons — handy if a song comes on and you fancy pushing on, or if you want to back off. The app folds your change in and carries on from there.
The goal is to get bored. Put on a podcast, settle into a rhythm, and let your heart rate become someone else's problem.
Lock your phone if you like — the ride keeps running in the background, a Live Activity shows your stats on the lock screen and Dynamic Island, and it all saves to Apple Health with the green workout ring. Drop your Watch or strap mid-ride? It'll tell you and let you switch sources without losing the session.
Step 6 — Finishing up
When you reach your set duration, the workout auto-completes — with an optional cool-down to bring you down gently. You can also stop early any time with the stop button. Either way you land on a summary, and if you've connected Strava, the ride uploads automatically, complete with power, cadence, distance and calories.
Didn't get to upload — phone died, ran out of signal? No problem. The ride is saved locally and waiting in the History tab under Pending Upload, ready to send to Strava whenever you're back online.
Watching yourself get fitter
The History tab is where the long game lives. List view shows your Zone 2 rides; the graph view plots them as bubbles you can pinch to zoom. Over weeks, this is where the magic shows up — not in any single ride, but in the trend: the same heart rate, slowly buying you more watts.
A few first-ride tips
- Start too easy. Everyone's instinct is to ride too hard. The whole point of Zone 2 is restraint — if in doubt, go easier.
- Give it a few minutes. Heart rate lags effort, and zone targeting deliberately holds off for the first three minutes before it engages — so don't judge it from the opening minute.
- Wet the strap. A dry chest strap reads erratically for the first few minutes — a quick splash of water fixes it.
- Trust the boredom. If it feels too easy and a bit dull, you're doing it exactly right.
That's the whole thing. Pair, pick, press start — and then let the easy hour do its quiet work.